Clothing Tips For Your Photoshoot

Mike Turner Photos Clothing Tips and Ideas

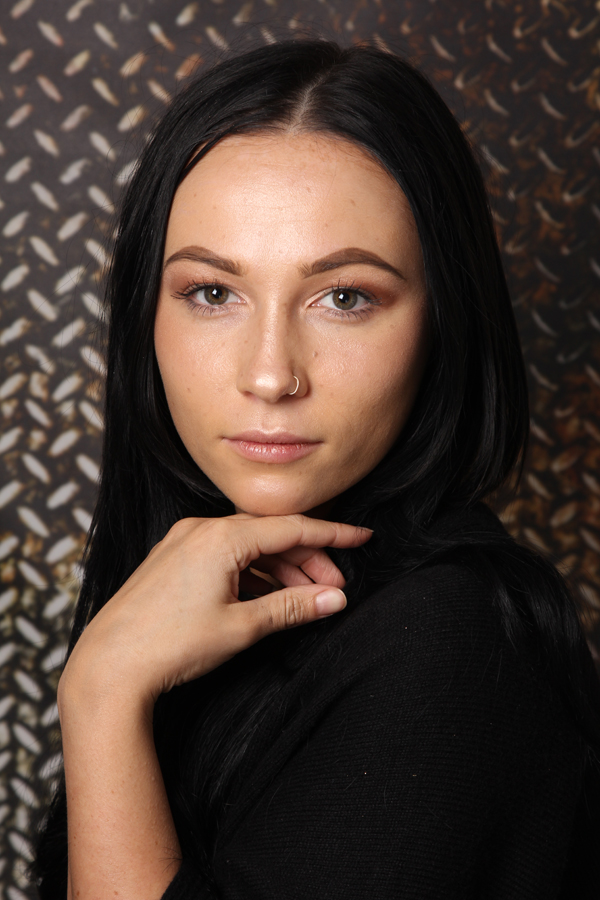
When it comes to deciding what to wear for your photoshoot, it’s best to keep it simple and plain. Try to avoid busy patterns and bright colours. Aim for neutral complementary colours where possible, unless bright and patterned is more representative of who you are.

It’s also a good idea to think about where you’re going to be displaying your images in your home and what will look good in that setting.

If you’re participating in group photos, think about matching styles and colours so that they go together. I always recommend neutral colours that don’t distract the viewers eye.
For instance if most participants are wearing dark clothing and one is wearing white, this will make the white outfit stand out and distract attention. This will make it difficult to place that person in group shots without making the photo look unbalanced, unless the person is placed in the centre of the photograph. This will greatly limit the amount of posing variations during the photoshoot.

Patterned outfits have the same distraction element, drawing the attention of the viewers eye, with the added complication of making the photo look busy and noisy.

It is very important that you feel comfortable in whatever you wear and it be in keeping with the style of portraiture you are wanting. Formal shots look best wearing formal clothing. casual style images look best, yes you got it, in casual clothing.

If you’re particularly uncomfortable with showing your arms or legs, wear clothing that helps cover these up.

If you’re wearing a strapless top, please consider wearing a strapless bra, at least if you’re female. This helps prevent straps showing up in the final photographs.

The main thing to remember is to feel comfortable in whatever you wear. Make sure your clothing is representative of who you are, after all it’s a portrait of you.

If you’re unsure, please feel free to bring a selection of clothing options and we can help you choose the best options at the studio

Check out some clothing ideas below.

https://www.pinterest.co.uk/info1549/clothing-ideas-for-your-photoshoot/

Get Results Achieving your GOAL: Being a Better Photographer

Become a better photographer by using the get results triangle

When it comes to learning something new, developing a skill, or achieving a GOAL, such as becoming a better photographer, there are three things you need to consider, these are:

  • Acquiring the relevant KNOWLEDGE
  • Finding the appropriate level of MOTIVATION
  • and moving forward in a PRODUCTIVE manner

Motivation

The WHY is the most important aspect of your journey. This is what drives you forward. When you come across obstacles it’s THE WHY that will help you to overcome them. Make sure  you’re doing what you’re doing or about to do what you’re about to do, for the right reasons. Don’t do it for other people, do it because you passionately want to do it yourself.

I’ve put Motivation at the bottom of the pyramid, in the illustration above, for the simple reason that it’s the basis for any progress forward, without it you just aren’t going to follow-through.

As well as finding the drive to move forward, there is a force that is actively working against you. This force is FEAR, fear of failure, fear or moving outside your comfort zone, even fear of success. Carefully look into your psyche and examine what is stopping you biting the bullet and taking the next important step towards your goal, you’ll inevitably find some form of fear is the culprit.

Knowledge

The HOW is next for us to take a look at. Acquiring the relevant knowledge is our next consideration in the process. Knowledge acquisition is twofold,

  • finding reliable sources and
  • obtain accurate information from them

When it comes to finding reliable sources of information, the best advice I can give you, is to find someone who has achieved whatever you’re aiming to achieve. If you want to learn about photography for instance, then who better to take advice from, than a professional photographer? Someone who makes a living from the very thing you want to learn about.

Consider finding a mentor who is willing to devote some of their time to helping you out, also consider mastermind teams or role models as sources of information. On the subject of learning photography, I have lots of free information on this site to help you do just that. Alternatively check out my one to one photography tutorials which are designed to hold your hand through the learning process.

So in summary, finding someone who offers advice and knows what they’re talking about, is the takeaway from this section of the article.

Productivity

Last but not least is, the WHAT and WHEN. These are the fundamentals of productivity. Productivity is not about being efficient, it’s about being effective, and there is a big difference between the two. It’s about getting the most important things boxed off. Find the one, most important thing that can be done to get maximum impact and do it. Ask yourself, “What’s the one thing I can do now such by doing it, everything else will be easier or unnecessary.” The difficulty is often identifying what your priorities should be, what’s important and what’s not. Again our one to one photography tutorials will get you over this problem and set you up on the right path.

What's the one thing...: Mike Turner Photography
What’s the one thing…: Mike Turner Photography

So there you have it, stick to the Get Results model outlined above and that is exactly what you’ll get, RESULTS. Check out the get results model here for more information, well worth a look, and never forget to enjoy the journey. Life is not a destination.

Strobing and Freckles Makeup Tutorial

stobing and freclles makeup tutorial

Step By Step Tutorial

Step 1 – Apply Strobe Cream by Mac to all areas.

Step 2 – Mix Strobe Cream with Mineralise Foundation by Mac and apply with Zoeva silk finish brush (102)

Step 3 – Add Nars Illuminate to cheek bones nose and fore head and blend with fingers or silk finish brush.

Step 4 – Powder with Soft and Gentle Mineralise Silk Finish by Mac, apply with Zoeva Luxe Highlight (105)

Step 5 – Dot Freckles with Lingering Mac pencil and dab with finger to soften.

Step 6 – Apply nude lip colour from Mac Pro Palette Brown

Step 7 – Highlight inner corner and brow bone with Hey from the Warm Neutral palette.

Step 8 – Apply Honey Lust and Ginger Snap from the Warm Neutral palette with mac 217 brush. This will compliment the overall look.

Demonstrated by professional makeup artist Sheryl Sword

strobing makeup tutorial

Christmas Masquerade Makeup Tutorial

christmas masquerade makeup tutorial

Christmas Masquerade Step by Step and Products Used.

1. Cleanse, tone and moisturise the skin. For this I used Kaeso Beauty products.
2. Apply primer to the skin with a synthetic brush. I used Smashbox Photo Finish Primer.
3. With a white eyeliner pencil, draw the shape of the mask as a guideline. This can be changed and perfected as you go along.
4. To make the mask look more realistic, apply eye make-up to the area inside the eye holes of the mask so that it looks like the mask is being worn on top of a made up face. I applied Urban Decay’s potion eye primer in Eden then used shadow’s from Urban Decay’s Naked Palette, then finished off with Illamasqua’s Precision Gel Liner in Bback and powdered down with a Mac matte black. I then applied Maybelline’s Colossal Lash Mascara with a disposable wand.
5. Using a large sized flat brush and clown white face paint (I chose Snazaroo), paint the shape of the mask onto the face. This will create a stronger base for your glitter to sit on top of.
6. Using a smaller brush, paint over the top half of the mask with a different colour (I chose Snazaroo’s Metalic Gold) and fade the colour out as you get towards the central line of the mask.
7. With a synthetic brush, apply cosmetic grade glitter to the mask. I used Stargazers glitter shakers in Gold, Hologram and Silver from top to bottom. This will create more of a Christmas feel to the overall look.
8. With a medium sized, flat synthetic brush, apply foundation to the skin around the mask. I used a Real Techniques bush with Illamasqua Skin Base Foundation in shade 4.5, then used shade 15 to create a contoured effect. I then buffed the foundation with Real Techniques Buffing Brush and applied Estee Lauder’s Lucidity Pressed Powder in Light/Medium with a large natural fiber brush.
9. Following the foundation application, apply blusher slightly below the apples of the cheeks with a medium sized, soft natural fiber brush. I used Mac’s Blusher in Blush Baby.
10. With a small angled brush, outline the mask with black eyeshadow then use a pale brown colour on a soft fluffy blending brush to blend the black out. This will create the illusion of a shadow around the mask and make it look like it is lifted slightly off the face.
11. In small sections, apply a cosmetic grade adhesive to the outline of the mask with a fine cheap brush and place small diamantes or gems to add detail. Your brush will probably be ruined and in need of throwing away after use due to the build-up of adhesive. I applied black gems with Snappy G prosthetic adhesive, which I patch tested on my model’s skin previous to creating this look.
12. Apply some false lashes to the eyes. I used some cheap lashes that were bought from eBay with a latex based adhesive that had also been patch tested on my model previous to the demo. Using tweezers helps to position the eyelashes in the correct place.
13. Finally to finish off the look, apply a lipstick with a suitable synthetic brush. I used Revlon’s Super Lustrous Lipstick in Black Cherry 477. I then set the whole look with Urban Decay’s ‘All Nighter’ setting spray.

Michelle Jo-an Hodson is the makeup artist who carried out this tutorial

Christmas Masquarade Makeup Christmas Masquarade Makeup Christmas Masquarade Makeup